
Do you need to change your Chevy 1500 4X4 ball joints? If so, this article is for you! Read on to learn how to change ball joints on chevy 1500 4X4 and install a new one. The process of changing ball joints on chevy 1500 4X4 will take about 30 minutes but will be worth it when you see how much better your vehicle drives afterward.
Ball joints are a vital component of your Chevy 1500 4X4. Ball joints let you steer and control the movement of your wheels and absorb shock and impact that would otherwise be transferred to other suspension components. Unfortunately, depending on driving habits–or just plain luck–a ball joint may need replacing every two or three years.
But not everyone has the knowledge or expertise to change them out themselves. So if this sounds like you, don’t panic!
We’re going to walk through step-by-step instructions for changing ball joints on a Chevy 1500 4×4 so that you can do it yourself at home with an inexpensive tool kit from any auto parts store.
You’ll need to have some basic tools and knowledge of your vehicle before starting this project. It’s important that you use the right size tools such as socket, or else you risk damaging the bolts and/or ball joint!
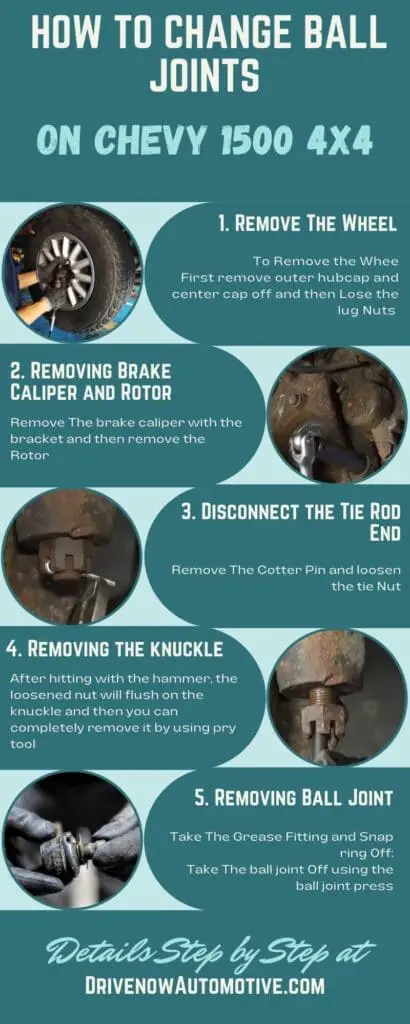
How To Change Ball Joints On Chevy 1500 4X4: 13 Easy Peasy Steps
Tools you required for replacing the ball joints on Chevy Silverado 1500 4X4 are:
- Metric socket set: For removing the bolts on your vehicle
- New ball joints
- Ratchet and extension: For taking out the bolts
- Torque wrench: Torque wrench for torque it down to factory specs.
- Jack and jack stands or ramps: for getting under the vehicle safely.
- A pry bar: For separating the joint from the axle.
- 15/16 inch wrench
- pickle fork (optional)
- Ball joint press: For press the new ball joint in, (learn how to use ball joint press).
- New cotter pins: for securing your bolts after you have torqued them down to factory specs.
- Hammer: A hammer can be used if you don’t have a ball joint press. In that case, You need a hammer and a pickle fork to remove the ball joints. As Well as for tapping the ball joint back in place.
- Wire brush: wire brush to clean the area of dirt or rust before installing the new ball joint.
The process of changing ball joints on a chevy Silverado 1500 is as follows:
Part A: Remove the Wheel:
First, you have to take the wheel off to do this follow the easy 3 steps:
Step 1 Removing outer hubcap and center cap off:
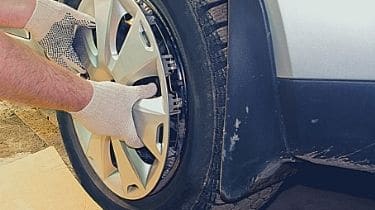
Use a flathead screwdriver to pry off the outer hubcap. Be careful not to scratch the hubcap. A common mistake is using a metal screwdriver, which can damage the cap or chrome on your wheel.
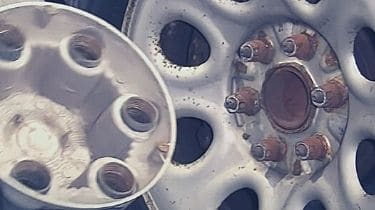
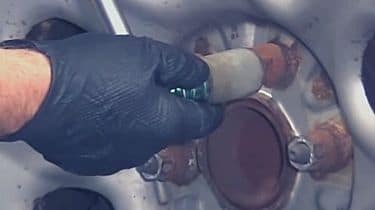
Also, remove the center cap on top of your wheel by unscrewing it with a 22mm socket.
Step 2 Lose the lug Nuts And Remove The Wheel
Take a breaker bar and a 22mm socket and loosen the lug nuts. Do the same for the other side of your car if you are replacing both sides.
Now that you have loosened all of your lug nuts, jack up your car and remove the wheel off completely.
Now that you have completed step two, it is time to take off the caliper and rotor
Part B: Removing Brake Caliper and Rotor
Once you have finished with step one, you need to take off the rotor and brake caliper with the bracket so that the pads stay in place.
Step 3 Remove Brake Caliper:
Loosen the bolt on top of the brake caliper that holds it in place with an 18mm socket and a breaker bar. Once you loosen up the bolt a little bit, take a ratchet and remove the bolt completely. [source]
Now use a flat-headed screwdriver to put it in the space between the caliper and rotor. Pry it out a little bit with the screwdriver. If still stuck, squeeze the piston, and the brake caliper will come off easily.
Warning: Don’t let the brake caliper hang by the brake line; it could damage your lines. To avoid tension on the braking hose, wrap a bungee cord around the bracket and the caliper and hang it from a suitable place.
Step 4 Remove The Rotor:
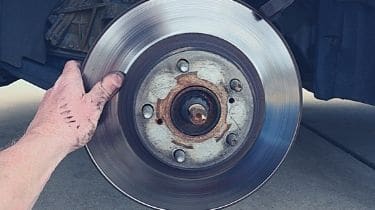
Now that the brake caliper is off, take off the rotor with your hands or use a rubber mallet to tap it out. You can use a marker to mark spots on the rotor so that when you put it back, it matches the position.
Part C: Disconnect the Tie Rod End
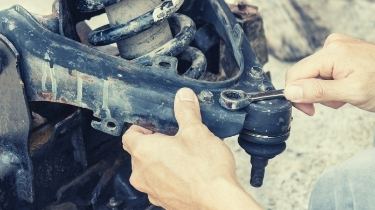
After removing the brake caliper and rotor, it is time to disconnect the tie rod end, which will allow you to move the knuckle away from your steering rack.
Step 5 Remove The Cotter Pin and loosen the tie Nut:
Use a pair of pliers to remove the cotter pin and then place it into your parts container. Now loosen up the tie nut using a 22mm socket and a breaker bar. But remember, don’t take the nut off completely.

Now take a hammer and a punch. Put the punch over the loosened nut and give few light taps on it. This will help in breaking off the tie rod end stud from its socket, which is located inside the knuckle.
Part C: Removing the knuckle
In this step, you will remove the knuckle/ steering knuckle from your car. This is probably the most difficult part, but once you get it off, everything else will go smoothly.
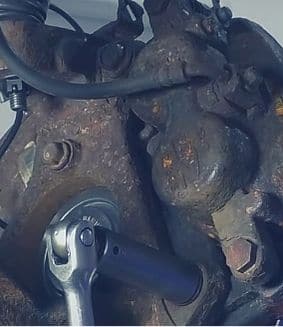
Step 6 Remove the cotter pin, Loosen the knuckle Nuts:
Remove the cotter pin from your ball joint studs by using a pair of pliers. Now place them into the parts container and use a breaker bar to loosen up the two nuts that are at the top of each ball joint while keeping an eye on its position with respect to “gap direction.” In my case, I used an 18mm wrench to loosen up the upper ball nut and a 22 mm socket for loosening the bottom one.
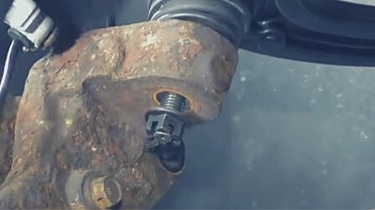
Note: remember that you are loosening up only one nut on each ball joint. You do not want to completely remove them yet.
Now Come to the upper Ball joint and hit the knuckle with a hammer. This will help in loosening up and removing the upper ball joint from its socket.
After hitting it with the hammer, the loosened nut will flush on the knuckle and then you can completely remove them from each other.
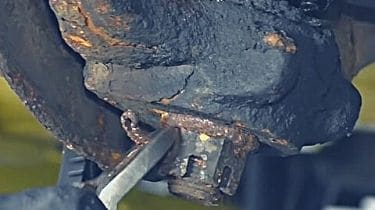
Another way of releasing the knuckle is using the pickle fork. You can use the pickle fork to remove the upper ball joint by placing it under the knuckle and hammering it.
Do the same process with the lower ball joint.
Once both end release, take the pry bar and pry down on the upper control arm to get some room to put the nut off from the knuckle.
Part D: Removing The Upper and Lower Ball Joint:

Step 7 Take The Grease Fitting and Snap ring Off:
If your lower ball joint has a grease fitting, take it off. If it doesn’t, don’t worry about it. To take the grease fitting off, use a 10mm wrench and take it off.
Now take the snap ring out using snap ring pliers. Spread the handles of the snap ring pliers to disengage it from its groove. After doing so, slowly release them and remove the snap ring by hand.
Step 8 Take The ball joint Off using the ball joint press or Alternative Way:
Now put your ball joint press into its place and tighten it down with socket and ratchet. In that way, you can easily press out the lower ball joint from its socket.
A quick tip: when removing the ball joint tightening handle would be above the control arm.
Now similarly, remove your upper ball joint using the ball joint press.
If your ball joint press adapter does not fit with the lower and upper ball joint, then use a hammer to drive out the ball joint from its socket. To do this, lower the control arm to fit with a jack stand. Here you have to use the jack stand to give sturdy support to the control arm so that it does not move while you are hammering the ball joint.
Repeat this process for the upper side as well.
Part E: Installing The New Upper and Lower Ball Joint:
Step 9 Installing Ball Joint:
Now grab the new ball joint and install it into the lower control arm using your ball joint press. Next, put the ball joint in the adapter’s big cup. The big cup will be on the bottom of the ball joint press. And above, put the smaller one.
A quick tip: when installing the new ball joint tightening handle would be under the control arm.
Now it tight it all the way down into the smaller cup, so that the new ball joint can get installed from underneath. And slowly release it to remove it from its big cup. Make sure that the ball joints fit tightly with the control arm and there is no gap. There should also be a groove for a snap ring.
Once done, install the new snap ring using the snap pliers and grease it.
Now repeat this process for the upper side as well. The process of replacing the ball joint for dodge ram is almost the same. Check this review If you need the best ball joint for dodge ram 2500 & 3500.
Part F: Reinstall All The Things:
Once both ends are done, reinstall all things in reverse order. To do that, first install the knuckle;
Step 10 Reinstalling the knuckle:
Now, take the knuckle and put it into the ball joint. Tighten the nut but do not tighten it completely. Now lower the upper control arm and put in the upper ball joint, and then partially tighten that nut.
Next, put the outer tie rod end on. Tighten it with the nut at the bottom.
Now you can start tightening your lower ball joint nut. If the stud spins and the nut won’t tighten, put an Allen key on it and then tighten it. In my case, I used an 8 mm Allen key to hold it still while tightening the nut.
Finally, you need to use a 24 mm socket and torque it down to 81 foot-pounds or as per your vehicle specs.
Now tighten the upper ball nut with the ratchet and socket. Use the torque wrench to make sure it is tight enough. This time, it should be 37 pounds of pressure.
After that, Install the cotter knot on both joints. Always use new cotter knots.
Step 11 Reinstall the tie rod:
Now, you have to use a socket and ratchet to tighten the outer tie rod. Use the torque wrench. Tighten with 44-foot pounds of force. Put a cotter pin on the nut when finished.
After that, put the sway bar link in using a pry bar. Put it under the sway bar and slide it up to position it. Now slip the stud through the link, put the grommet on top, and tighten the nut.
Now, tighten the sway bar link with a 15 mm wrench and 15 mm socket and ratchet. And finally, torque it down to 17 pounds.
Step 12 Reinstall the Rotor:
Take the rotor and put it on its hub. Next, unleash the brake caliper from the bungee cord that we placed in the earlier step. Now put the caliper on top of the rotor, make sure the brake hose is not twisted, and slide the caliper into the position.
Now use an 18 mm socket to tighten the bolt and finally torque them down with a force of 129-foot pounds.
Step 13 Reinstall the wheel:
You have to slide the wheel over the lug studs and put on the nuts in this part. Next, tighten them using a 22mm socket wrench. Finally, make sure you tighten them down to 140-foot pounds of torque.
After installing the center cap, tighten it with a 22mm socket. The caps are made of plastic and can’t be forced. And finally, install the outer hubcap.
First, raise the truck with a jack and set it on jack stands. Make sure you use safety chains to secure the vehicle when using jacks because even if your chevy is lifted safely without any issues, sudden loss of power could cause an accident. If you do not have access to a lift or don’t know how to properly use a lift, you can ask a friend or family member who owns one.
Last Updated on April 23, 2026 by Rifen